Maine Central, Lamoille Valley

Maine Central, Lamoille Valley
Click image to link to my web site, nekrailroad.com

Thursday, December 28, 2017

Scenery Work

I have not posted in December, but I have been doing some work on the layout. As in previous posts, I continued work on the Johnson Rt. 15 scene. A cleaned up some scenery areas that were missed in the initial round. I also added a paid of bicycle riders and road signs, along with highway guardrail. Next up will be putting the concrete walls on the highway overpass. That will finish up the majority of the background scenery items. Moving forward I plan to add a gas station to the gravel lot area, finish track detailing and ballasting, add some more trees to the hillside, and finally address the talc mill buildings needed.

A couple of bike rides take a break going up hill. A wash out of the road next to the guard rail is posted with safety cones. The new Pass With Care road sign is installed.

The gravel area to the left will have a small gas station added in the future. And next to the truck will be the concrete sides of the VT Route 15 overpass that crosses the Lamoille Valley track below.
I jumped over to Groveton NH and finished up track ballasting that was not initially completed. It is amazing that if you stop work on something just how long it can sit in a certain state until it gets addressed again! I had roughed in scenery and the paper mill buildings, plus the wood chip pile, but the scene was still not really finished. It looks better now with the ballast, but I need to push forward and add the wood chip unloading conveyor, sone vehicles and people, and some weeds and other details to better finish the scene. I also need to paint the water tower. But at least the ballast is in, the track cleaned up and a new coat of CRC 2-26 on top of the rails to ensure good operation.

The other half of the Groveton scene now has ballast on the track along with rust chalk to the rail sides.It looks a lot better, but I still have more I want to do here.
With the ballast out I figured it makes sense to continue that work and ballast the trackage through Whitefield. I've operated enough to know I am not going to change any track at this point, ad ballasted and rusting up the track will go a long way towards making the scene look complete.

I will also focus on the tree line along the backdrop, to extend from where to stops at Crawfords and continuing all along the Whitefield area. To get that started, I decided o address the harder part of getting the spot where the B&M and MEC tracks leave Whitefield and go through the wall. No actual tunnel here on the prototype so some trees are needed to hide the departing tracks. I got a good start on them and the view is decidedly better from most angles now. Once some more trees go in, plus the Whitefield Plastics building, the entrance to the hidden trackage should be less obvious.

I did the ballast first and let that fully dry. Doing the scenery and trees can be messy, so there will be some vacuum work to clean up things, like the spilled red ground foam on the turnout. The B&M track in the back is pretty well hidden now. The MEC track to the front still can see the hole in the wall, but it is less obvious. There will be more trees added, but the view from this area makes it tough to fully hide.

Looking from the edge of the wall shows the start of the trees to hide the track. The spot here will house a somewhat newer building for Whitefield Plastics, which will receive a covered hopper of plastic pellets on the track to the front. I think in front of the track and around the end will be paved or gravel (or a combination).
I have to identify the building for Whitefield Plastics. I have a number of DPM brick kits and parts, but somehow a brick building here does not seem appropriate. The real building arrived after the MEC stopped running here, and never had rail service despite being nearby the tracks. I am thinking a metal sheathed building is more appropriate.

Next up will be continuing the ballasting through Whitefield and extending the tree line the rest of the way along the backdrop. I think these tasks will do a lot to make the layout look more complete, which is something I want to address for the coming year as the layout approaches 15 years since it was first started.


Thursday, November 16, 2017

Simple Brake Holding CP Train RS-1 on Grade

For Canadian Pacific train RS-1, a local that leaves Newport (staging), it's first assignment is to switch cars at Lyndonville, which is an industrial park with a trailing point siding leading to a few industry spurs. I have a couple of temporary tracks in Lyndonville now, but want to add some more soon.

Due to the grade of the mainline coming out of Newport and progressing all the way to St. Johnsbury, Lyndonville has the main line on a grade, while the industrial park itself is flat. What this means is that CP RS-1 passes the switch for Lyndonville park and then backs its whole train into the siding and the park. It cannot leave any part of the train on the main line due to the grade.

This has worked OK as the operator can use the whole train to switch the training sidings, and work around keeping his caboose in the right spot. I thought about adding an extra unused siding where the caboose could be dropped. But it has always bothered me that the operator switches with the whole train, even with it being a short train.

I've seen various articles and pictures of different methods to hold a train on a grade, using ground throws, levers, Tortoise machines, etc. However I did not want to invest a lot of effort into something that would be used once per op session.

While doing some switching and using a wooden skewer to separate cars at the Kadee couplers, I thought that it would be easy enough to "assign" a skewer as a brake to hold the caboose and through cars on the main, and allow the train to pull forward, back into the park to do its work and then return back out to the main to pick up the waiting through cars and caboose.

It only took 5 minutes to implement the solution and the pictures are pretty self explanatory. I doubt I am the first to think of this specific idea, and sticking something like a pin into the track is something I have seen, but I like the ease and visibility of the "Hill Brake" skewer.

The caboose for RS-1 and the 1 through car wait on the main as the locomotive and Lyndonville cars will back down to the track in front to serve the local industries.
(Eventually there will be scenery and trees between the CP mainline and the MEC mainline above and behind. The CV/LVRC track is part of hidden staging)

Looking upgrade - the skewer nicely holds the train using the the Kadee coupler of the caboose. I put a little flag on the skewer so it would be more obvious what it's purpose is!


A close up of the Hill Brake skewer. It sits off to the side of the roadbed, easily accessed. Silver Sharpie marks the location of the holding hole as well as the spot to keep the skewer.

Wednesday, November 15, 2017

Open House November 18th

I forgot to post that this November's Open House tour includes my layout on Saturday November 18th, from 12 noon to 5pm.

To see all of the open layouts Saturday as well as the rest of November, check out the site below:

http://themodelrailroadopenhouse.com

Click on the "Visitors" menu and choose Event List.

Hope to see you!

Tuesday, October 24, 2017

Making Trees

As I have been re-staging the layout and getting things situated for another Op session as well as an upcoming open house, I have tried to identify some things I could work on to move the layout along, visually. This mostly involves scenery work, although I did put a couple electrical items on the list I would like to tackle before the next session.

(Electrical: basically adding some on/off switches for staging tracks, something I should have done when I was doing the wiring on these tracks initially. There are a few easy to convert tracks I have identified to get the process started)

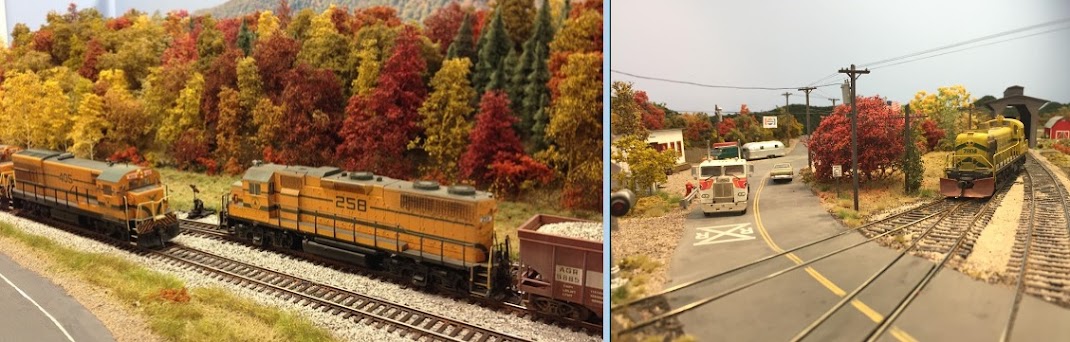
No doubt one of the biggest things I believe make a positive visual impact is adding some trees, particularly along the backdrops. Even without some foreground scenery in place, the train running past a completed tree line really looks nice. I have a couple areas where the backdrop is in and some basic ground cover exists between the tracks or other scenery, and all I really need are some trees.

I have a supply of Super Tree material waiting to be turned into individual trees. I did find that before summer started I had spent some time separating the material and doing some straightening prior to painting them up in preparation of adding ground foam and/or foliage leaf material. So these will be worked on soon, as I usually do that part outdoors. I thought I would share pictures of the straightening process as it utilizes a soldering iron, which sounds crazy but is very effective.

Here we see a pretty good tree armature, but it has a pretty severe bend!

Using a soldering iron, I can quickly touch the main stem to soften it and bend it back to straight. It only take a few seconds and works good if you apply pressure with the tip in such a way as to bend it back to straight. Often this can be done by doing it in a few key spots.

And just like that the tree is looking much better, straight and ready for a quick painting and then flocking.

About 20 years ago, when Super Trees were not really too well known or in use, I was at the Timonium train show and came across a lady selling tree kits. I believe her name was Jane. I'm pretty sure the product, Forests in a Flash, is not available anymore, but it is not a bad alternative for trees. It does not have the density of branches per stem like Super Trees, but can be combined to make a nice looking tree.

She would take the plant material and dye it to specific colors, and then bag it as kits. This process also kept the material quite flexible. She demonstrated how to combine multiple pieces into a single tree and ways to build up the trunk effectively.

In my stash, I still have material from the kits I bought way back then. At the time my wife used the material to create some birch trees, combining the yellow and green material to create a blended look.

Grabbing the material I set to work up in the family room as we got caught up on some TV watching that does not require intense focus (!). After cleaning up each stem piece to remove leaves, I painted the stems and some of the branches with white paint to represent white paper birch trees. I then combined multiple stems to make individual trees. I wrapped the trunk end with some white wire and trimmed the excess stem material below. I set each tree into holes in some scrap foam and then used white acrylic caulk to cover the wire and build out a truck base.

Later I will do some touch ups and add some black marks to better represent the birch trees.

The material comes packaged in single colors and includes some basic directions.

After painting the stems white I combined individual pieces together and then wrapped the bottom "trunk" with white cloth covered wire to hold them together, I placed each tree into scrap foam with holes punched in specifically for holding trees.

Here is a batch of trees ready for the next step of adding white acrylic caulk to build out the trucks. Each tree combines the yellow and green, which individually looks a little odd, but when placed together to represent multiple trees, the effect is nice and looks similar to birch trees that are yellowing out at different rates.

I used up about half the material I had, so another session will be in order create additional trees. I'll mix these in with the Super Trees and then set about filling in space along the backdrops to create a more finished look.

I'll post some pictures the completed trees in place once I get them planted!

Tuesday, September 26, 2017

How I Spent My Summer

Well, Summer is officially over now and Fall is here. I realize I have not posted since May, so a whole season has passed. I must admit that I have been pretty tied up with other things and have not done much model railroading. But hopefully now things will settle down and progress will continue on the layout. Plus there are some events coming up I need to prepare for.

So much like going back to school, here is my How I Spent My Summer report, specifically from a model railroad perspective.

I wrapped up Spring finishing up a flatcar load project. Inspired the Kalmbach Freight Car projects book I picked up at Springfield, I worked on an open lumber load for a bulkhead flatcar. This used inexpensive wood strips purchased at Michaels, glued together and then "tied down" with EZ-Line.

This Walthers NAFX bulkhead flat was sitting unweathered and crying out for a nice load. It also allowed me to add some needed weight concealed within the load.
I also started some scenery work at Johnson, building up the landforms and putting in the Route 15 roadway. This has some basic scenery in place and next up will be finishing the road with striping. I'll post more on that once the scene is further along, but I did get a good head start before the summer hiatus. (You can see a bit of the work completed in one Op Session photo below).

In late June I held another Op Session. This included another new operator to break in. All in all it went well, although I still need to work out some wrinkles in the overall plan as we still did not get through a full schedule yet. Here are some pics:

Bill Howard held down duties at Morrisville and has a good handle on things now. Meanwhile Joe Hueber attended his first NEK Op Session, and is bringing the LVRC train through Johnson, where you can see a little preview of the scenery going in there.

Chris Conaway worked the Gilman local job, which had some new twists that worked out well, easing some of the pressure on the St. Johnsbury yard operators.

Phil Duba wa son hand again and worked the B&M Groveton local turn up to Whitefield. This job also had some new twists that I found worked very well. 
Bruce Barrett and Mark Fryzstacki again worked the St. Johnsbury yard and have become quite proficient in keeping things fluid. 
Throughout each month if the summer I was able to attend the Op Sessions at John Rahenkamp's large Clairmont, Lewistown & Western layout. I have been holding down the Bayview job and have taken and posted a number of pics and some video to the NEK Layout Facebook page.

This shot comes from early in the session as I am picking up empty coal hoppers to build the coal trains over in the yard to head back up to the PA coalfields for reloading. This view shows just a small number of the nice urban buildings John has built for the layout.
In July we returned to the White Mountains for some vacation time. I did not spend too much time seeking out the trains in this area as I have visited many times and have many pictures. However one rainy day we took a long ride up north and I came across the New Hampshire Central trackage above Whitefield, up to Groveton and North Stratford. It was interesting to see the freight car facility I visited some 17 years ago is now a trainload facility for propane tank cars (it was raining too hard to stop for pics there). I did get to see an idle NHC Geep in Groveton, and see some repair work in place on the old Groveton Station.

New Hampshire Central GP9 7324 (ex-NYC) sits idle along the mainline next to the empty area that once housed the large paper mill at Groveton. No active railroad activity here in this rainy Monday.
 
Directly opposite the GP9, the Groveton station shows some recent repairs in place on the roof. St. Lawrence & Atlantic trackage between Maine and Montreal (ex-Grand Trunk) is situated behind the station, while the NHC (ex-B&M) track is to the right of the station (where the GP9 was parked). I'm not sure what the overall plan is for this area or the station.
In August we took a trip down to Baltimore Inner Harbor. Not much left of train activity in the area we were, but did see 2 older railroad relics while taking a ride on the Water Taxi.

This older building along the waterfront still shows faded "Railroad" lettering between the 2nd and 3rd floors.

This old pier still has rail in place, which can be seen overhanging the wooden structure. Trees in the background are actually growing on the pier itself, which is not accessible (or too safe looking) for people, let alone rail cars!
Our final stop takes us to Florida. We visited relatives over Labor Day weekend (before the hurricane). Although we flew down, we did leave by taking the Trip-Rail train from Delray Beach back to Fort Lauderdale airport. While waiting for the Trial-Rail train, the Amtrak train 98, the northbound Silver Meteor out of Miami made a station stop. I thought this was cool as I had just recently put a Seaboard Air line boxcar with Silver Meteor lettering onto the layout (see post).

The northbound Amtrak 98 Silver Meteor stops at Delray Beach while we waited on the next southbound Trip-Rail commuter train. The Amtrak train arrived right as we were getting on the platform, so this was the best shot I could get.
So that concludes my Summer report. I'll be back to work on the layout for an open house in November, as well as doing some module work for the NER Newport Convention in November and the Springfield show in January. I also want to get in another Op Session. So there will be more to report in the coming weeks.

Friday, March 17, 2017

NEK Track Schematic

One of the requests I had from previous operating sessions was a track schematic that operators could refer to to better understand the layout and where locations are in relation to each other. I put together a basic schematic in a drawing program that I can post around the layout.


Not all tracks are shown, but passing sidings are included along with the 2 main yard areas.
The dashed lines represent hidden staging areas.

Hopefully this will be easy to understand. The somewhat unusual part of my layout is the representation of multiple "mainlines" of different railroads.

The top line represents the Maine Central Mountain Division between Portland and St. Johnsbury. Included is the Boston & Maine line between White River Jct. and Groveton, crossing the MEC at Whitefield.

The middle line represents the Canadian Pacific between Newport and East Deerfield. The Maine Central joins in via the A connector. Meanwhile the Lamoille Valley joins in via the B connector.

The Lamoille Valley is on the bottom line and runs between St. Johnsbury and St. Albans. The Central Vermont line runs between Richford and St. Albans and crosses the Lamoille Valley at Sheldon Jct.

Not shown here is the connector between Sheldon Jct. and Lyndonville. This would be the shorter dashed line at the bottom right connecting in via a switch by Lyndonville on the middle line. this is not used in actual operations but only as a way to have a loop for open houses.

Likewise, the connection between Portland staging and E. Deerfield staging is not shown. Again this is strictly for creating a second loop for open house running and is not relevant to operations.

This should be another helpful addition to the various operator aids. I look forward to finding out how useful it is for the operators, and to see what feedback and suggestions they have.

Monday, March 06, 2017

Three Old Boxcars

A few years ago, while planning to do some airbrushing, I decided to plan ahead and paint a number of cars and locos even if I was not planning to work on them right away. I figured given the time spent setting up and airbrushing, followed by full cleanup, it would be best to maximize the units getting painted. As best as I can tell, that was over 6 years ago. Since then I have addressed a number of those projects, bit not all of them.

Part of the lot involved painting some undecorated Details West boxcars. These were the "yellow box" kits that included a few different 50' boxcar styles and included a more enhanced under frame than the standard Athearn "blue box" kits of the day. I've always liked these kits, and one of the things that really drove my early participation in model railroading was the desire to replicate cool 50' boxcars in the "Railbox" style as well as older outside sheathed cars like the DW models.

Recently I have been cleaning things up a bit and moving in progress projects to the recently acquired  IKEA drawer unit. and I came across 3 painted DW shells ready for decals and finishing. I decided to spend an evening dealing these cars while in the family room with my wife watching the Oscars on TV. Decaling is a pretty easy task to integrate into TV viewing,

I feel I have a lack of CONRAIL equipment in general on the layout, but it is really useful in conveying the time period as post 1976. This Champ decal set was in my collection for probably 40 years, so it is nice to finally see some usage. I was not going for 100% accuracy on this car number, but looking to capture the look of similar CR boxcars. I used quite a bit of chalk weathering on this car and I like the way it tones down the whites decals.

Another Champ decal set drove this car. I could not find much in the way of prototype pictures of 50' SAL boxcars and almost decided to skip this particular car, but I like the unusualness of an SAL car (in contrast to my overall roster) and the large logos. It probably is more appropriate for an older style car. I do plan to do a bit more with this car, repainting dimensional data and other things as you would see on an older car in the 1970s. For now it has a basic weathering coat done, but I will get more aggressive later.

Here is a prototype example that I plan to use to drive my additional weathering and detailing.

I had ordered a set of BAR boxcar decals from Highball Graphics in 2001(!). Since then some nice examples have been released in this scheme, but BAR cars were very prevalent so adding another still made sense. Again, not 100% accurate for the number series, but a good representation. This has black ends, and I added some basic weathering here as well, which again gave a nice effect to the lettering looking a bit faded.
It was fun doing these 3 cars and getting 3 projects off the back burner and ready for the rails. All 3 will probably see some more work, from weathering as I mentioned to replacing the stirrup steps on each corner.

Looking through my decals, I have probably a lot more things I planned to do that will probably not happen now. A lot of this has to do with the better quality freight cars that exist now versus when I actually acquired most of these decals. But there will always be that need for something different, and always a desire to go back and enjoy a simple paint and decal project.

Tuesday, February 21, 2017

Woodsville Terminal

In my last post I mentioned the Woodsville Terminal Railway Co. This was a fictional shortline created by Mike Confalone that he modeled before switching over to the Allagash (which has been covered very well by Model Railroad Hobbyist magazine in articles, e-Books and videos). The older WTRC was covered in Model Railroad Planning.

Decals were made for the Woodsville Terminal by Highball Graphics, part of their Freelance Railroads series. I picked up their set FL-1 for Woodsville Terminal boxcars as it offers a neat paint scheme that clearly identifies the location of the (fictional) railroad being in VT and NH.

Highball Graphics set FL-1
On my car I went with a more orangish color than what Mike and Neil Schofield used in the examples from the Highball Decals web site, This was so it would not blend in too easily with the large number of Maine Central cars I have.

WTRC 2601 looks real spiffy having just recently been placed into service. This is an Intermountain car I stripped the lettering off and repainted.
What is cool is the slogan actually mentions Northeast Kingdom. The font is similar but not the same as the Lamoille Valley. All in all a pretty neat looking car that looks right for my region and era.

I have some other WTRC equipment, purchased from Perkins Road Depot. These are wood chip hoppers with extended sides. These use custom decals otherwise not available.

I picked up this wood chip hopper from Dave of Perkins Road Depot while at the Springfield show this year. It joins 2 others purchased in the past, one black and one brown, 
In the past I have staged woodchip hoppers in Morrisville yard for the LVRC to deliver to the MEC and ultimately to the B&M for use at the Groveton paper mill. I assumed that the WTRC performed an interchange with the LVRC somewhere along the line and at the start of an op session, these hoppers were already in the yard.

Lately though I have been thinking about establishing a WTRC train to bring some cars into Morrisville during the session. I think it will add a neat little enhancement to the LVRC operations without too much of an impact. It will also give me the chance to look into some WTRC locomotive power, perhaps a re-lettered D&H unit, and maybe at some point an actual painted loco in the WTRC scheme, something I'm not sure Mike C. even had completed, but I'll have to find out.

Thursday, February 16, 2017

Morrisville Turnouts Complete

I finished off the work on the installation of the 2 turnouts in Morrisville that will provide an additional passing siding (see previous post). After having the track in and wired, and after doing some test runs, I needed to get turnout controls in place. The rest of Morrisville has front edge mounted Caboose Industry ground throws, but doing the same would be nearly impossible given the existing track and scenery.

During an Op Session, last year before the new turnouts were installed, Bill Howard(in white) has the ground throw controls right at his finger tips along the front edge of Morrisville. One new turnout is where the caboose is, but on the second track from the right pictured. No way to to run a throw rod there now, so undercount control became necessary. The other turnout is about where the CV brown boxcar is next to the silo.

So I figured the best bet was to put in Tortoise machines. A benefit to automated control vs. manual throws is that whenever a turnout needs to be thrown, both need to throw in order to have a clear path. That meant I could simply have 1 control for the operator.

I had read somewhere a while back that mounting Tortoise machines on a longer piece of wood can assist in getting the throw adjusted. By lining up the machine's rod with the throw bar and then putting a single screw towards the rear of the piece of wood into the subroadbed above, you have the ability to slightly move the turnout left and right to get the throw just right. This avoids needing to keep removing screws and repositioning.

I found this this method worked great and I wish I had done it on the other installs I had where seeing the top and bottom at the same time is not possible. Of course having someone assist also can help, but much easier to just drive a couple wood screws then try to screw the actual machine in over your head!


This is pretty good picture of the method. I mounted the Tortoise to the thin birch plywood panel. Note - I needed a second piece  (in this case scrap poplar) to prevent the small screws from protruding through, but using one thicker piece would have worked as well. I positioned the throw rod up through the throw bar and kept the Tortoise edge even with the throw bar so there was no bend to the rod. I set the one screw at the far left, then tested the throw. Pivoting the the plywood allied for a minor adjustment to the left to right throw, and once I had it working well, I set the second screw closer to the Tortoise to lock it in place.
With that work out of the way, I mounted a single DPDT switch for the operator to throw both turnouts. Oddly enough, this is the only DPDT I have on the layout as all other controls are either DCC or touch panel. It was a simple matter of getting the right wires matched up to have both turnouts throw the proper direction, and power was provided by a leftover 9 volt wall wart power supply mounted in this area.

I found just the right spot for the DPDT switch. Inside the Morrisville shelf area I had this angled piece. I simply drilled a whole for the switch and mounted it. The good thing is that it is directly below where the turnouts are, and nothing protrudes off of the fascia or into the aisle way.
With that work completed, I test ran sone trains and threw the switches to make sure all was well. 

On a related note, I have been thinking about adding a new train to the Morrisville operations. I currently have some fictional Woodville Terminal cars in the yard representing a fictional connection to the Lamoille Valley with this short line that used to be part of Mike Confalone's layout. It gave me a way to logically get these custom painted/decaled cars onto the layout. I thought about instead of staging these cars, I establish a transfer train for the Woodsville Terminal to deliver cars first to Morrisville, and return with anything going back to the WTRC. 

I put together a small train that I can stage beyond Sheldon Jct. using CV power for now, and ran it up to Morrisville. Here is a quick video of me using that train to back through the new turnouts and test things out.


With the track changes now compete, it is time to prepare for and schedule the next Ops Session!

Tuesday, January 31, 2017

Springfield Report

I'm back from the big Springfield show, and as usual, it was a great time. I did not hear anything about attendance, but it seemed very crowded both days. It was great to see so many familiar faces and talk to those I see maybe once a year. It was also great to meet and talk to those of you who read the blog and enjoy it. I'm glad you are out there following along!

Here are some assorted pictures and commentary from the weekend.

In addition to manning the Free-mo layout and doing operations (more on that below), I did venture out to the show floors across 4 buildings. I did not take too many pictures from the manufacturer booths, but here is one form Rapido showing some of their cool upcoming offerings. 

Got information I needed about LokSound decoders at the ESU booth.

Model Railroad Hobbyist magazine brought along their TOMA project layout (The One Module Approach to building a layout). I also talked a bit with Joe Fugate about his current and future layout.

It will be nice to follow along as MRH shares details on building this layout in their on-line FREE magazine.

Great scenery on the TOMA layout, which is based on the Vermont Railway.

Outside, a live, operating steam locomotive was on hand. It was nice to smell and hear this running during the weekend.


As figure 8 layouts go, and especially those using 3 rail O scale, this one is admittedly pretty nice!

The Free-mo layout was very linear this year, extending 200 feet, and included over 2 scale miles of mainline,  with additional trackage on 3 branches. This view is from my module area, near, but not at one of the ends. It goes all the way down to the just visible banner.
This is the track plan of the layout. The photo above looks to the left, with my module on the branch at the bottom right.


The recently completed FOS Scale Liquor Depot kit installed on the module. Looks like the local PD is checking things out, talking to one of the road crew.
A  new module at its first show demonstrated a clearance issue with a double stack train. Actually somewhat prototypical for a late 80s/early 90s mainline before clearance improvements would require "filleting" the stacks onto separate cars. No problem, as the owner quickly added additional base material to the bridge and the train proceeded without incident!


The weekend included free running on the modules, as well as Op Session time. Trains were made up in select yards and then instructions and a switchlist was provided to each operator. I ran light Maine Central power over to the Cedar Hill yard to pick up my train, a turn that serviced my Woodstown Jct, as well as the nearby Boston Street. Here I am returning with my train coming off the loop that transitions from the mainline onto the branch I am working.

My switchlist. The yard operator fills in the reporting marks of the cars requested by the ModuOps software, and my job is to spot these cars at each industry, and pickup the same number of cars (if they are there) to return back to the yard. My troublesome MEC 564 seemed to work OK throughout the weekend.

I arrived at Woodstown Jct with my train. The Lamoille Valley RS3 is the local switcher which can assist with local switching. This can be done with a second local operator, or solo using the second throttle.

I pulled my train up and let the local switcher work the tail end of the train for the facing point sidings and any cars for the yard side of the mainline.


A railfan talks to one of the railroad employees at the old freight house which now serves as a headquarters building for the local railroad.

With the local switcher having pulled all cars off the train and spotted cars at local industries, my train is ready to depart. the passing siding holds cars that will return back to Cedar Hill yard - No need to take them with me on the turn, I'll get them on the way back. Additional cars for the junction and other industries for the yard side of the mainline will be switched by the local RS3 while I am up the mainline at Boston Street.
Switching at Boston Street includes some street trackage. I've spotted a few cars and will now run around my train to drop the coal hopper at the facing point industry on my way back to Woodstown Jct. Once there I'll add the cars from the passing siding to the covered hopper seen here and return back to Cedar Hill yard.

We set up the Free-mo layout Friday afternoon into the early evening. On Saturday we operated and answered many questions to model railroaders and the public. So by Saturday night we were plenty thirsty. Here is about 1/3 of the gang enjoying drinks and dinner at a nearby establishment. Having fun socializing is one of the great parts about the Springfield weekend.
Looking forward to next year!